To add a reference directly to a folder, select the folder in the Navigation area and then select Add > Create New Reference .
When clicking on Title in the suggestion list, the contents of the reference will be replaced. When clicking on ISSN, ISBN or DOI, the contents of the reference will be supplemented. We recommend duplicating a reference before using the Title look up, to prevent any data from being overwritten.

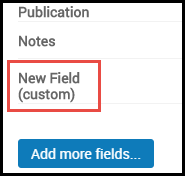
The custom field is saved and added to the reference. The custom field is now available to be added to all references.
New Custom FieldEither drag and drop a file into the Main area or select Add > Upload Document and select the file. The file can be in any format.
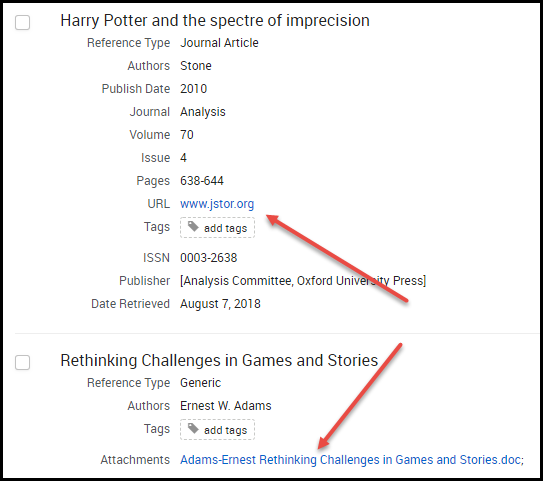
The file uploads as a reference with type Generic . RefWorks attempts to automatically extract as much information as it can from the uploaded file. Edit the reference to correct and complete the information.
If you drag and drop multiple files at one time, a reference is created for each file.
Users can import references from any reference management service. You can import directly from Mendeley. For other services, such as Zotero, you can import a file that you have exported from that service.
To import references:
Mendeley allows exports of up to 500 references at one time. See here for more information.
The folder structure will not be automatically imported.
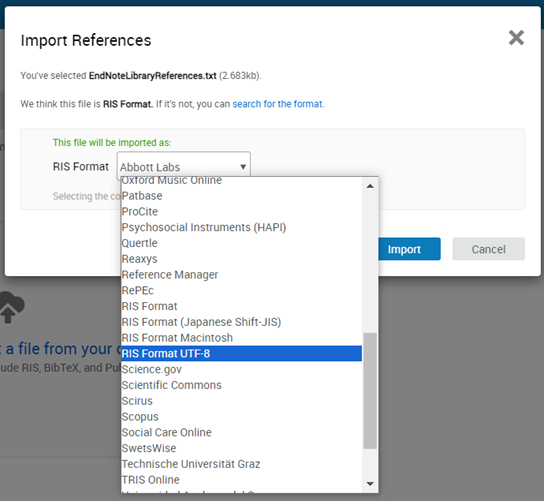
To import from a reference management service other than Mendeley, or another database or file: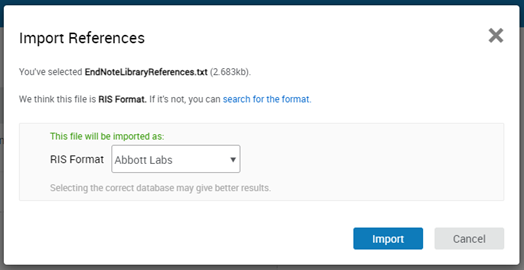
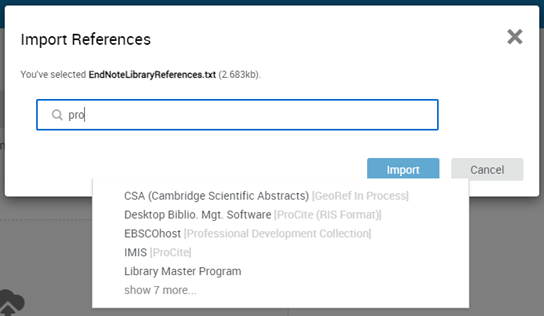
Choose your format from the dropdown.
Select Import.
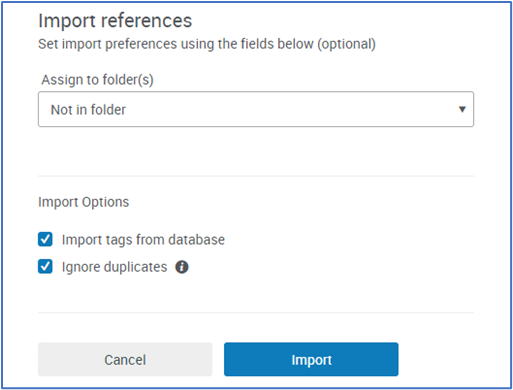
You can assign references to a folder, or create a new Folder, by selecting the drop-down arrow next to Not in folder. Select if tags should be imported and whether duplicate references should be ignored. Deduplication during import is based on Exact Match for: Author, Title and Year. It is based on the same algorithm as Finding Duplicate References.
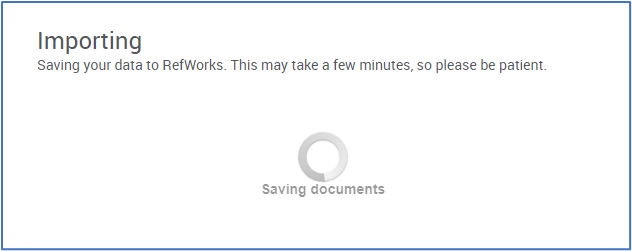
If you are importing a large file, you may see the Importing page.
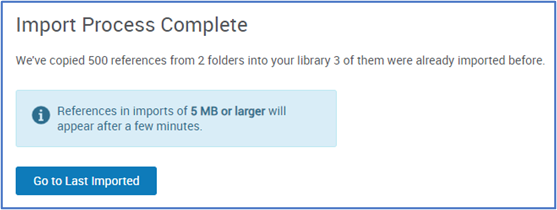
The Import Process Complete page will appear when the process has completed.
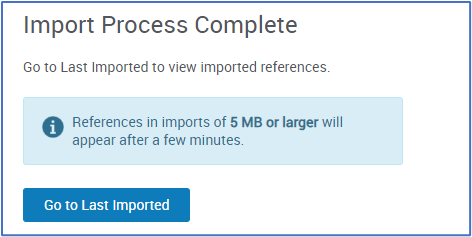
References in imports of 5 MB or larger will appear after a few minutes.
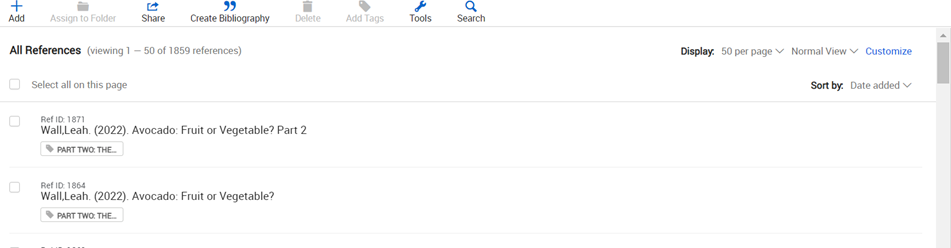
You can view a list of your references, a subset of your references, folders of shared references, or deleted references by searching, or by selecting the relevant tab in the Reference Organization area (see RefWorks User Interface). Each reference includes a unique reference ID (Ref ID).
Your options for viewing references include the following:
| View | Description | Sortable |
|---|---|---|
| All References | All records available in your RefWorks library except those placed in the Trash folder. | Yes |
| Search Databases | Search area to discover items in external databases. Visible if enabled by Institutional Administrator. | No |
| Last Imported | References added within the last 30 days. Select Delete to remove references. They are still available in My Folders (if they were previously placed there). | Yes |
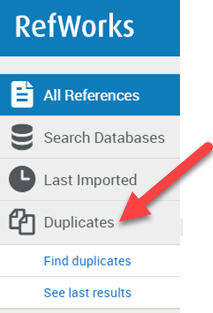
| Duplicates | Find and/or remove duplicate references. See Finding Duplicate References. See last results of your most recent duplicates search. | No |
| Sharing | References shared with you. See Working with Shared Folders of References. | Yes |
| My Folders | References in a specific folder or subfolder, or Not in folder. Subfolders can be nested up to three levels, for example: main > sub1 > sub2 > sub3. | Yes |
| Tags | Search for tags in this area. After selecting a tag, the encoded query string that matches references associated with that tag displays in the basic search box. | Yes |
| Trash | Deleted references are moved to the Trash folder. You can restore references using the Undo action. To permanently remove a set of references, select the relevant references and select Delete > Delete selected, and then select Yes in the confirmation dialog box. To remove all references, select Delete > Delete all. | Yes |
| Search | Use the basic search to search all fields, including text in an attached PDF (provided the PDF is properly OCRed). In the basic search, enter a tag name or any search string. After entering your search criteria, your search appears as an encoded query string in the basic search box and the matching references display in the center pane. Use Advanced for a more customized search such as searching in specific fields, or folders, or by entering an encoded query string. If advanced queries are enabled, the search text appears in blue. |
The number of references which appear on the page is displayed at the top of the page. You can change the number of references displayed per page, and switch between view options. Select Customize for Normal and Full views to display the Folders and Tags checkboxes. Clearing the checkboxes hides the folders and tags from the list of references. Pagination on the bottom of the page enables you to move between reference pages.
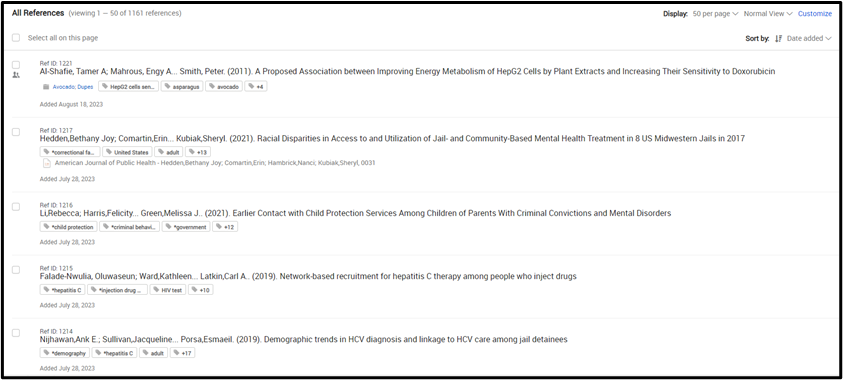
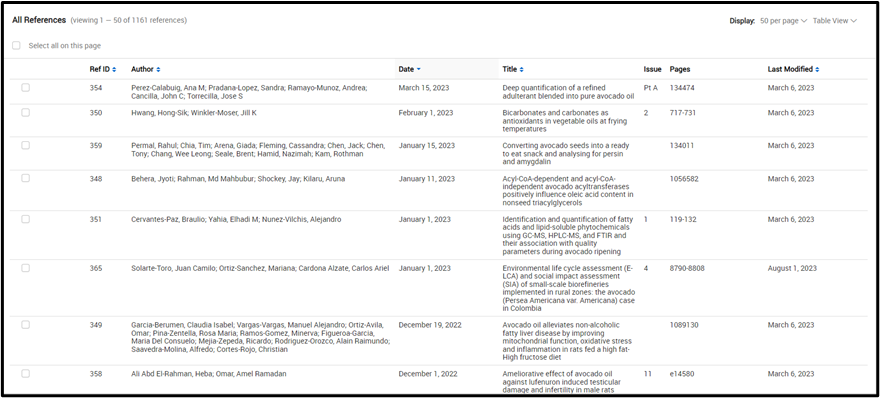
Table view – Another minimalist view. References display in a table for easy sorting. Table View does not allow for sorting by Date added. When switching to Table view from any other view which displays Date added, references will be resorted by Date. All visible columns, except for Issue and Pages enable sorting in the table header row.
Table View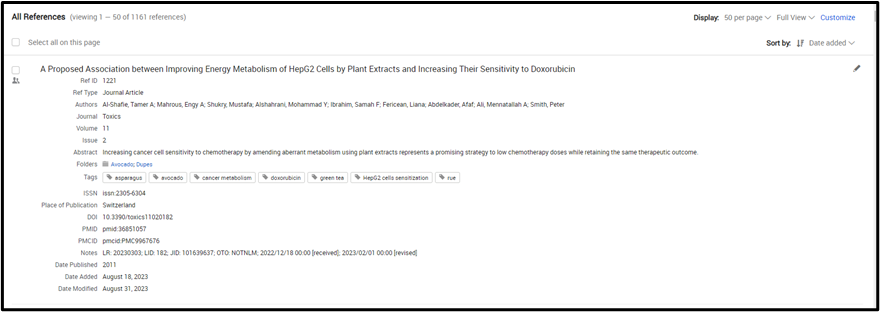
Full view – An expanded view with details, displaying Date Published, Date Added and Date Modified, regardless of which criterion is applied. Select a tag to refresh the page with all references associated with the tag. Select the text link to view the full text, if available. Select any other field to open the Reference Editor and edit that field.
Citation view – A bibliographic view. References are displayed in chosen citation style. Select the gear icon ![]() in the view options menu to select your preferred style. RefWorks highlights missing fields that are required or recommended by the selected citation style. Select the highlighted area to open the Reference Editor and edit that field.
in the view options menu to select your preferred style. RefWorks highlights missing fields that are required or recommended by the selected citation style. Select the highlighted area to open the Reference Editor and edit that field. 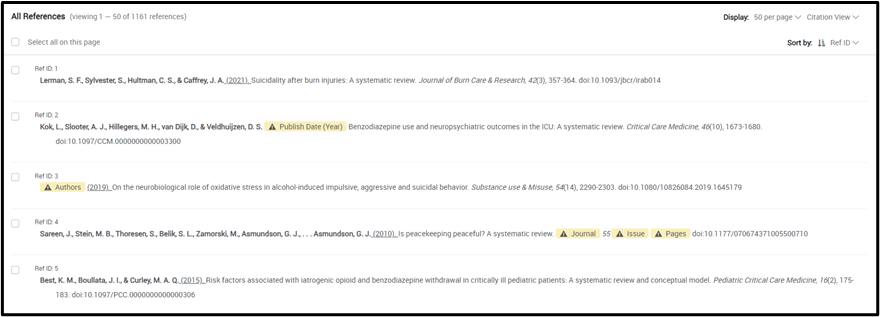
If you display a large number of references on one page, especially if you use full view, RefWorks may take a while to display the reference list.
When viewing a reference with electronic access to partial or full text, you can access it from the Reference Details. This may be access to the text within the library or on an external site, or the uploaded file.
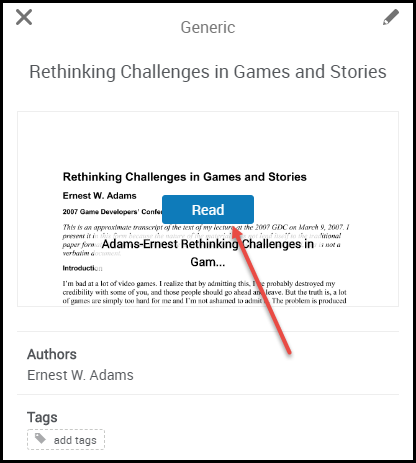
When viewing a list of references in full view, select the text link (if available) to view the text.
For some references, such as uploaded PDF files and HTML pages, full view of the reference is provided directly in RefWorks. The RefWorks reader enables you to download the document, and for PDF files, it enables you to highlight text passages, and add comments and notes.
Select the references and select Assign . You can assign the selected references to an existing or new folder or remove them from a folder. You can also copy selected references to another Project.

Folders appear in the My Folders tab in the Navigation area. The number of references in a folder appears after each folder name.
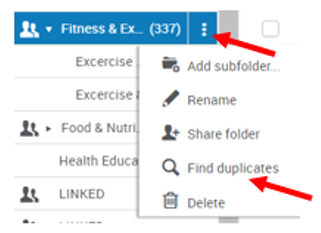
When the My Folders tab is expanded, you can drag and drop references to a folder. In addition, you can use this area to add a folder or a subfolder, or rename, delete, or share a folder. You may also Move or Copy the folder to another Project or Find Duplicates in the folder. Subfolders can be up to three levels deep, for example main > sub1 > sub2 > sub3 . Some of these actions are available in the folder's action menu.

Select the references and select Add Tags . You can associate the selected references with an existing or new tag or remove their association with a tag.
When the Tags tab in the Navigation area is expanded, you can drag and drop references onto a tag to associate them with that tag.
You can also manage tags when editing a reference in the Reference Editor.
![]()
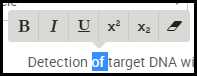
A rich-text edit bar is available when you select contents within certain text fields (including Title , Alternate Title , Abstract , Notes , and any custom fields that you added to RefWorks).
You cannot use regular expressions of any kind in either string: only simple text strings. Every instance of the matching string in the selected field is replaced with the new string.
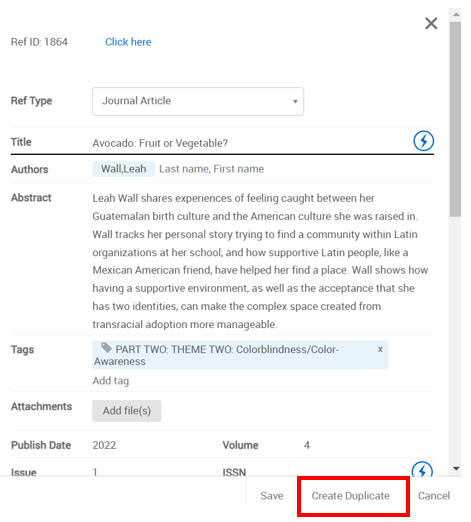
If you are working on several sections is the same source material, it is helpful to be able to duplicate a reference to save time and only have to change a few fields.
Attachments are not automatically duplicated and must be attached, if needed.
To duplicate a reference:![]()
You may also create a duplicate by opening the Reference Editor pane and clicking on Create Duplicate.
Make changes to any field in the Reference Editor and click Save.
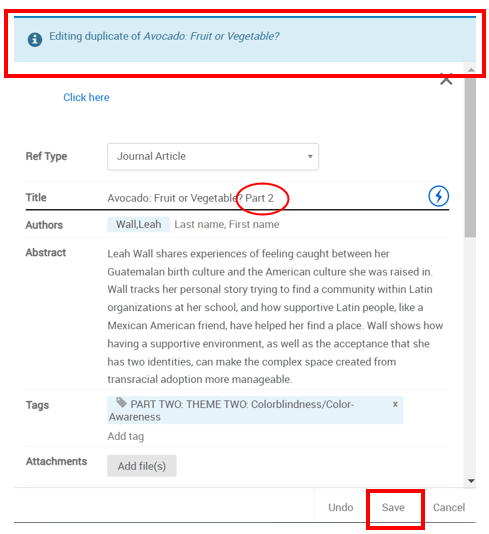
Your reference is now duplicated with changes you have made.
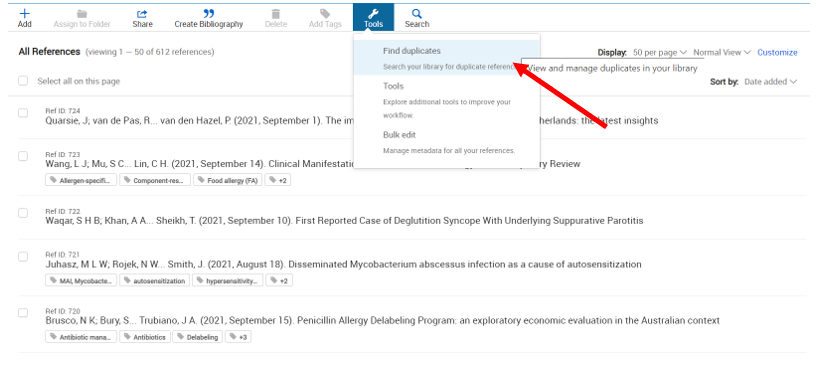
If you have many references or you have added references in bulk from several sources, it can be helpful to have RefWorks find any duplicates in your collection..
OR
In the left navigation select Duplicates and then Find Duplicates.
To look for duplicates in a specific folder or sub-folder, in the My Folders tab in left navigation, select Find Duplicates in the folder action list.
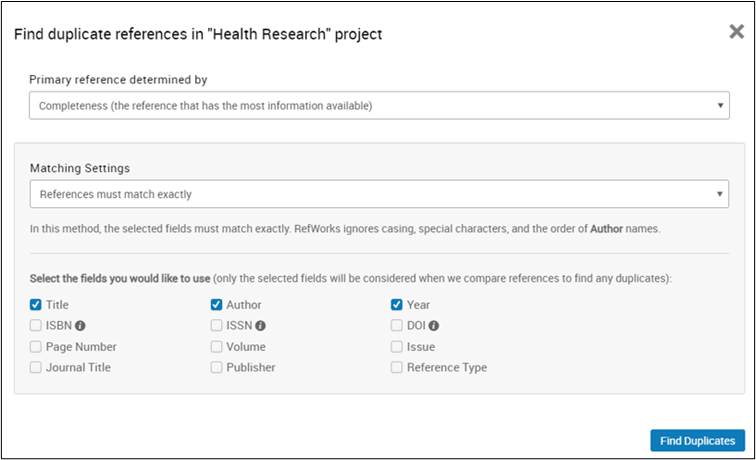
Note: If you select Year, ISBN, ISSN, DOI, or Page Number, close matches will appear for those references where an absolute match is found in the selected fields.
If Author, Year, ISBN, ISSN, DOI or Page Number field(s) is/are chosen in conjunction with Title, RefWorks also includes elements that appear empty. For example, selecting Title and Year where Title is found to be a match, but Year is blank in one record and populated in another, will result in a match.
RefWorks “References that are similar” match is based on the Levenshtein Algorithm.
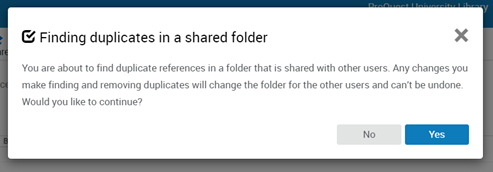
If you are searching for duplicates in a shared folder, you will first see the following message, with a choice to abandon or proceed.
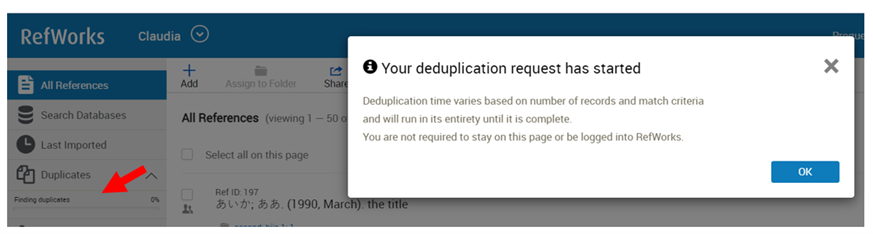
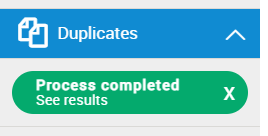
After the deduplication request is completed, you can click on the Process completed See results link in left navigation under Duplicates.
If any duplicates are found, they are indented, marked with red bar and pre-selected to make them easy to identify.

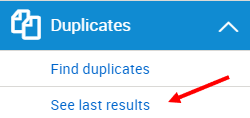
Any time after performing a Find Duplicates search, you can click on See last results to view the most recent Duplicate References search results.
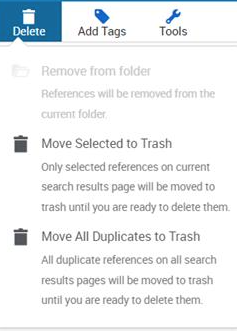
You may choose to move all duplicate references on the current search result page to trash, or move all duplicate references on all search results pages to trash.
If you deleted a reference from any folder or tab other than the Deleted tab, you can restore it. To restore a reference go to the Deleted tab, select the references to restore, and select Undo.

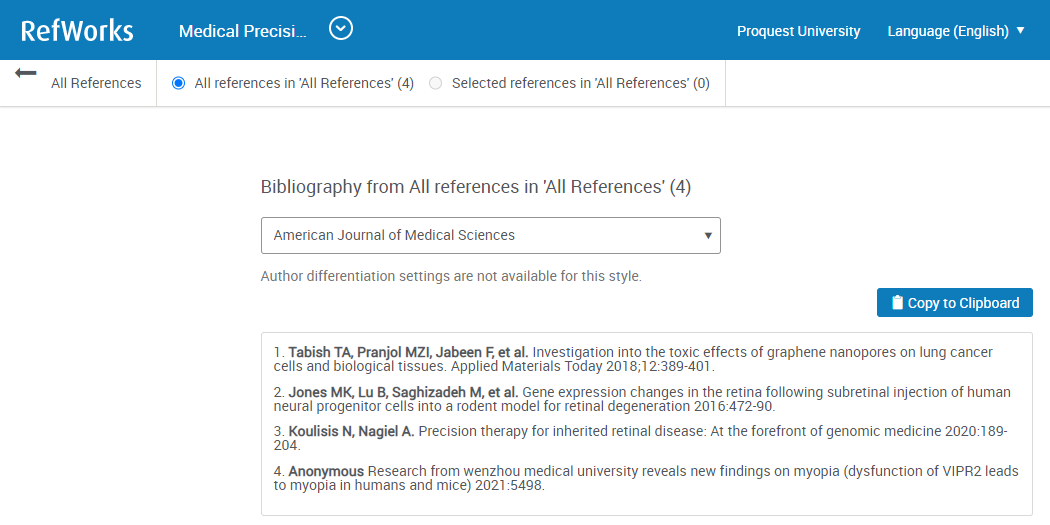
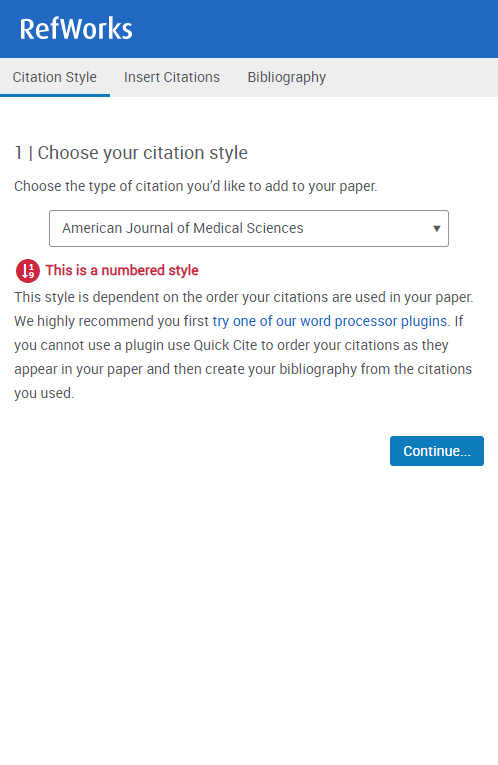
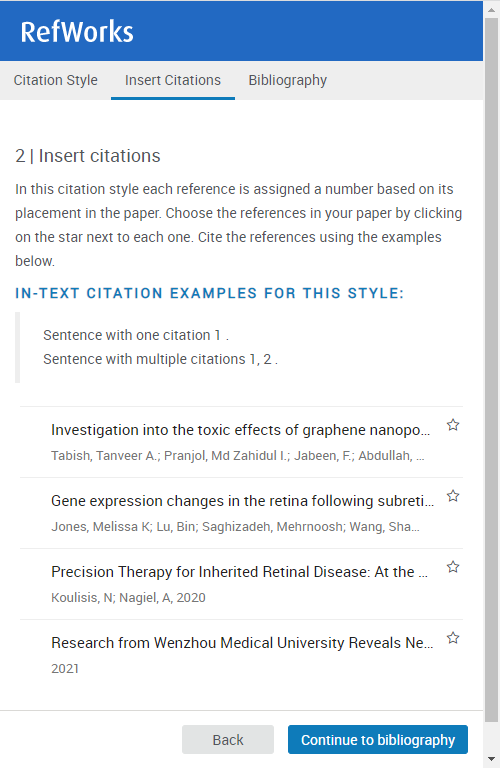
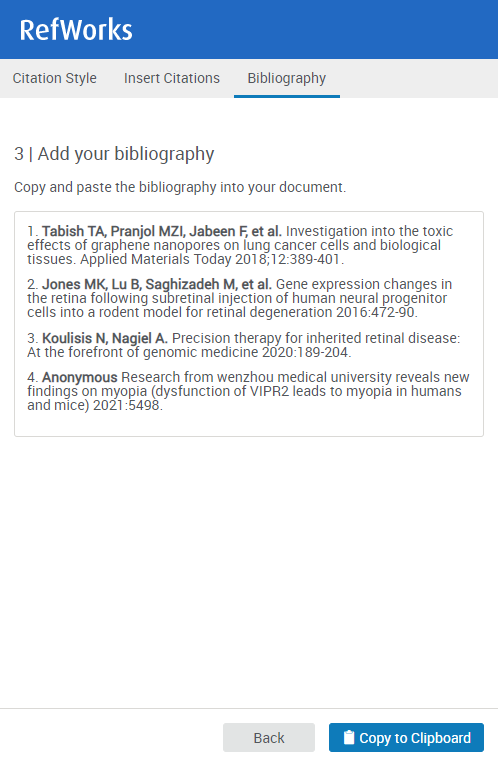
When citing your references in a document, such as Microsoft Word or Google Docs, you can use RefWorks to format one or more of your references for easy insertion into the document. You can insert a single reference or multiple references, and you can insert them inline and/or as a bibliography. You can select an out-of-the-box citation style (RefWorks or CSL style) or create your own style.
It is easy to create references in RefWorks to copy to your document, but it is even easier to add references while working in your document using a RefWorks add-on: In addition, you can manage references in a document using one of these add-ons (delete, re-add, re-style, and so forth).

Bibliography numbering and sorting is limited to 2000 references when using RefWorks citation styles. CSL styles numbering and sorting is limited to 500 references. After the limit is reached, numbering and sorting restarts.
To insert one or more inline citations (with or without a bibliography).If you require numbered references, we recommend creating citations and a bibliography within Word or Google Docs. Using Quick Cite, you must enter numbers or correct them manually in your document.
You can share folders of references with specific users and/or (when enabled) all other users at your institution and can view folders of references that are shared with you or your institution. You can view the references that have been shared with you, and in some cases add comments or change the references. If you want to edit or export references that have been shared with you, you must first copy them to your own reference folders.
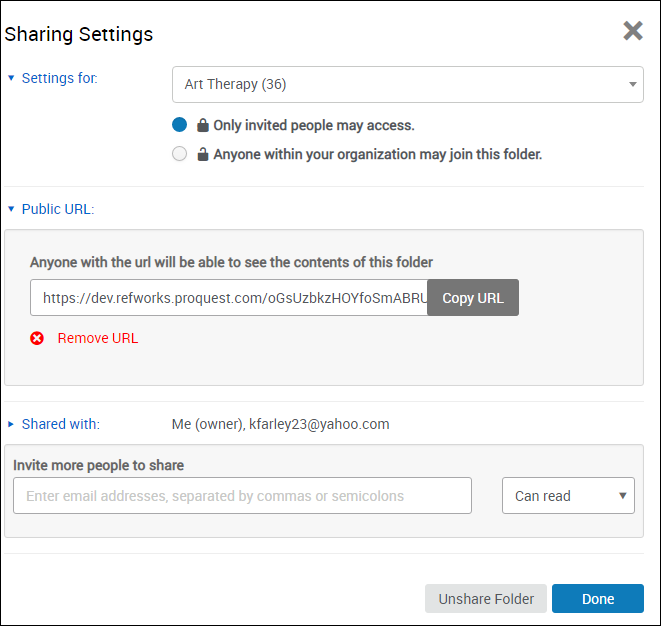
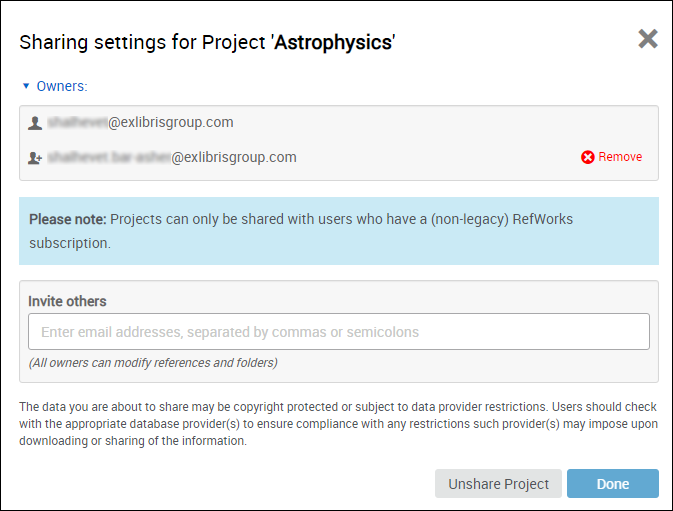
You can optionally enter a message to the user. The user receives an email notifying them about the invitation.
You can view users with whom you have already shared the folder, and can change or remove their access.
To unshare the folder at any time, select Unshare Folde r on the Sharing Settings dialog box and select Yes in the confirmation dialog box.
When a folder is shared with you, you receive an email indicating this. You can view the folder in the Sharing tab in RefWorks. All folders shared with you from a single institution are grouped together.

To view the references in a shared folder, you must accept the invitation: select Join in the folder's row.
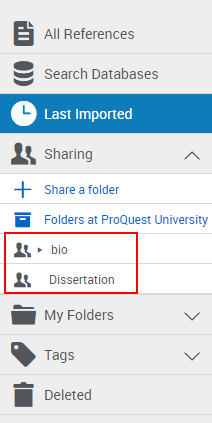
The folder appears in your Reference Organization in the Sharing area. All tags for references in this folder are added to your list of current tags.
You can export your references so that another user can import them without logging in to your account, or in order to import them to another citation manager. Also see Importing References.
To export references:Navigate to the folder you want to export, or from All References , or from any search results, select Share > Export references . The Export references dialog box appears.

Select whether to export all references in the current folder / search results or only selected references.
Select the output format: BibTeX, RIS, tab-delimited, or XML. Select the output ID: default, authoryeartitle string, or Ref ID onlySelect Export . The references are exported, including their field names and Ref ID. In a tab-delimited file, the first row contains the field names.
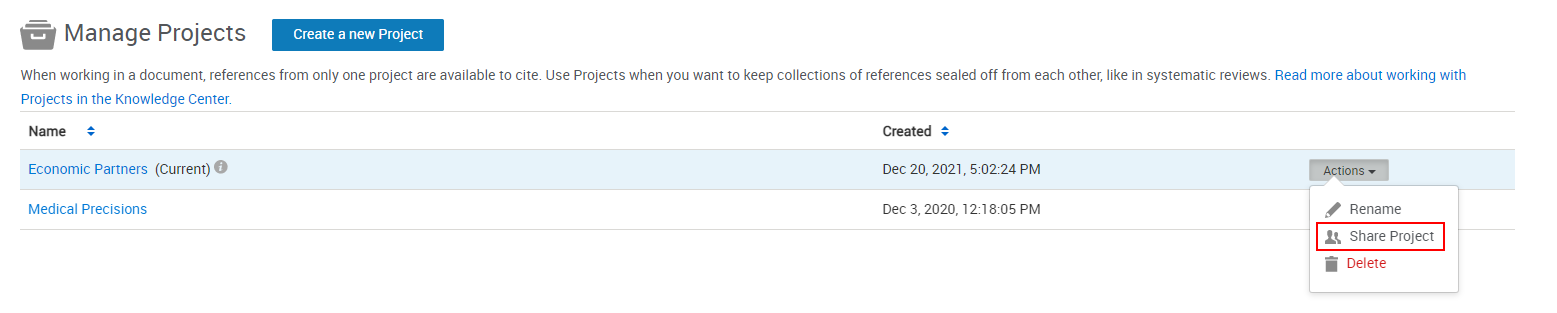
You can create projects in RefWorks. Projects enable you to maintain separate reference collections for different research projects.
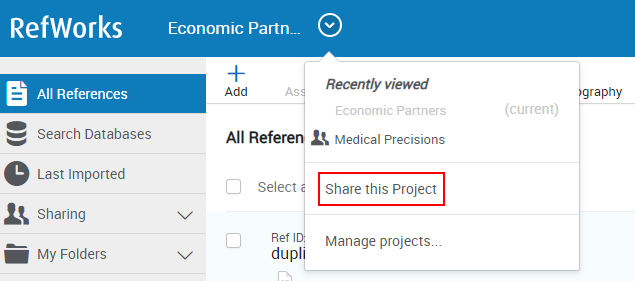
To manage projects: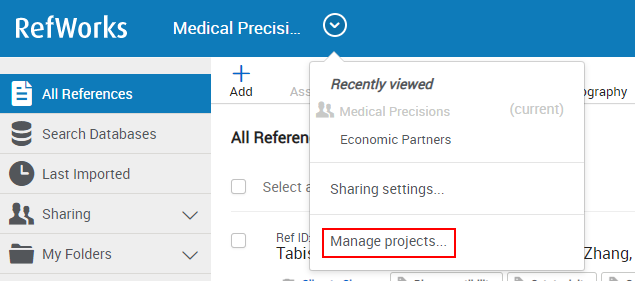


The project is added to the list of projects. You can navigate between projects from the Project Menu at the top of the page.
To move references from one project to another: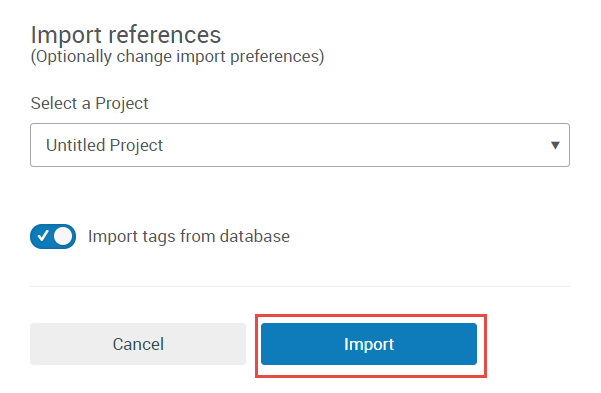
You can share your projects with other users of RefWorks. This gives them full permissions within the project, including adding, deleting, and modifying folders and references. Any shared owner of the project can delete the project, as long as it is not the current project of any shared owner.
Collaborating in a document via a shared project is not supported in Write-n-Cite.Sharing a project enables you to work collaboratively with other project owners when using RefWorks Citation Manager (RCM). A document with citations from the shared project can be emailed between users to which each owner can contribute. Each collaborator works on the document separately and then emails it to the other owners for further work, rather than multiple users simultaneously editing the document.
Reference IDs within a project are unique. Therefore, when you add a reference to a shared project, it may receive a RefID that is not consecutive to the last RefID of a reference you created.